Create New Paper Target
When there is a new batch of paper you have two options in creating a new paper config. You can copy from an existing target or create a new target.
Warning
Make sure developer is at full strenght before making a new paper calibration
Copy an Existing Target
- In Fusion click Copy…
- Type a The new batch
- Select the previous configuration that you want to copy
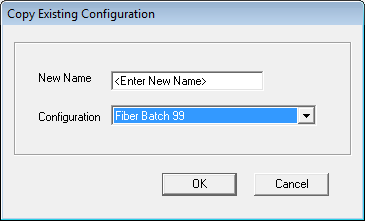
- Click Next…
- Re-print gray balance
- Iterate gray balance is necessary
- Link new calibration in Thrive RIP Queue
Creating Calibration New Target with Auto-Dmax
- In Fusion click New…
- Select Corresponding target file
- Start with the default RGB laser compensations
- Change Resolution to 300 dots / inch
- Click Print Auto Dmax Pattern
- Wait the 5 minutes for latent image to stabilize and processed media
- After processing trim and dry with hairdryer (fiber only).
- Evaluate the evenness of the RGB patches. Ideally they should be similar tonality
- Read the first strip and evaluate dmax.
- The dmax for a paper conig is saved in
C:\LightJetFE\blend\material30\[NAME OF MATERIAL]\default.tgt
- The dmax for a paper conig is saved in
Warning
If Dmax hasn’t been reached you must go back to the laser comps and manually change them. The Fusion software is fooled by the black and white paper and will make an incorrect guess for new laser compensation.
- Read the remaining strips

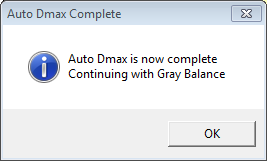
- Click Next
- If you don’t get the dialog saying Auto Dmax is complete you will have to _Clean Current Gray Balance_aa and start over
- If you don’t get the dialog saying Auto Dmax is complete you will have to _Clean Current Gray Balance_aa and start over
- Click Print Gray Balance Pattern
- Wait the 5 minutes for latent image to stabilize and processed media
- After processing trim and dry with hairdryer (fiber only).
- Read strips and evaluate cone
- If the gray balance isn’t in the cone click Next to Iterate Gray Balance
- Repeat these steps until a good cone result
- Link new calibration in Thrive RIP Queue
Linking Calibration Target to Media
- In Thrive RIP-Queue click Configure Printer
- click Yes to shutdown printer
- Switch to the Device tab
- Click Features
- Click Media Type then Configure…
- Select the media type you want to update
- click Edit (If no Edit button appears you will need to double click the media type)
- Type the name to match the paper type and batch number
- Select the calibration for the corresponding batch
- Click OK
- Click OK
- Click Done
- Switch the Media tab
- Select media type
- Clcik Options…
- Change Media Type in the drop down to match batch number
- Click OK
- Click OK
Flashing Paper
In order to determin the maximum density of paper you will need to fully expose the paper to light then process it.
- Cut off and expose paper fully to light for at least a few seconds
- Feed paper into processor and fully processes
- If fiber paper fully dry paper
- On the densitometer press menu then pap to read paper dmax
- Send through densitometer to read dmax. You will need to cut the paper to a small enough size to fit.
- Dmax reading is the absolute maximum black density for the paper/chemistry combination.