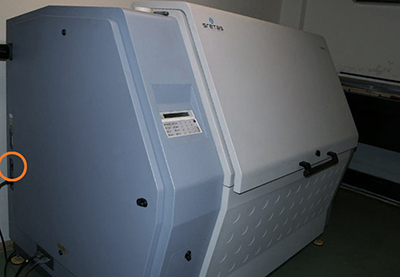
LightJet Overview
LightJet Startup
- Turn on air compressor in the cutting room
- Turn LightJet power switch on. It’s located on the left side rear. Booting and warm up takes about 15 minutes.

- Turn on both workstations
- Print and process a grey balance to check developer quality
Loading Paper
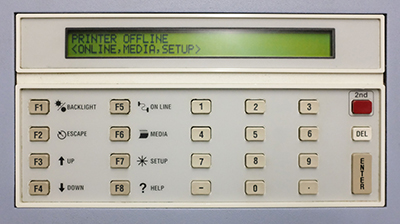
The image above is what the LightJet looks like when it is Offline. Offline is the mode that allows you to access all menu options. Online is the LightJet ready to print.
The options on the display correspond with the three buttons on the panel. Online (F5), Media (F6), and Setup (F7).
LightJet Offline
If the LightJet is Online press ON LINE (F5) to toggle LightJet from Online to Offline.
-
Press Media to bring up the Media menu.
-
Press Enter to initiate loading mode.

- Select media type which will be Paper and press Enter

- Select media width to match loaded paper width and press Enter

- Feed paper into feed rollers
- If you haven’t printed a grey balance press Enter but don’t tape media to take up reel. If you have and are ready for exposure tape to take up core.
Calibration Check (Grey Balance)
- Open Fusion 3 application
- Select Configuration Name that matches paper loaded in LightJet from drop down list
- Click next
- Click Re-print Gray balance Pattern
- Wait for imaging to finish
- Wait at least and additional 5min for latent image to stabilize
- In complete darkness open LightJet and cut off paper.
Warning
Close LightJet after cutting off paper otherwire you riske forgetting to close the door and accidentally expose paper when leaving the darkroom.
- Feed paper’s left edge first with the emulsion facing up into the processor.
- The total processing time in 17 minutes.
- After processing is complete; trim and dry with hairdryer (fiber only).
- In Fusion click OK that the plot is ready to be processed and then click next
- Read strips in the densitometer one at a time starting with strip 1 (the right most strip).
- Click Next
- Evaluate cone
- The cone is the white area which shows the tollerance of deltaE values of the patches
- The ideal cone should be wide on the left with most lines inside. There is room for flexibility with the cone and judgment is required.
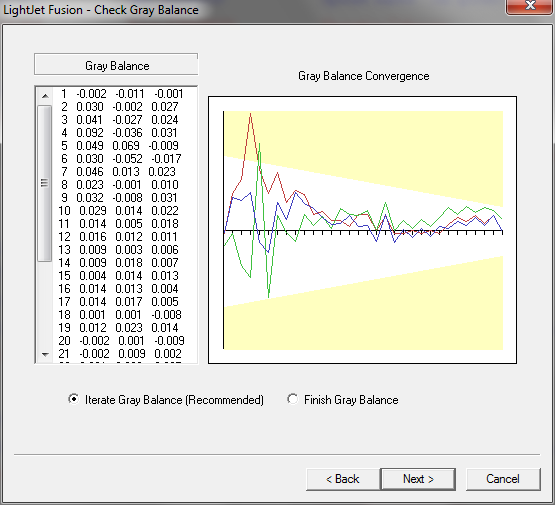
- If the cone is acceptable click Cancel and exit Fusion 3
Warning
Do not click Next because Fusion will try to iterate the grey balance and you risk making a worse calibration
- If you read in a calibration strip that is too light (lines lower than cone) it means that the developer is too weak and needs to be replenished.
- If too dark (lines higher than cone) means that the developer density is too high and needs to be deluted.
- Dump proportional to the amount the adjustment is needed
- Repeat steps above until there is a good result
- Turn off display
- Advance paper for taping to core for printing.
- On LightJet press the following buttons to advance the media 8 inches. It will advance enough paper in order to tape onto the take up core before printing.
- Online
- Media
- Down arrow
- 8
- Enter
- On LightJet press the following buttons to advance the media 8 inches. It will advance enough paper in order to tape onto the take up core before printing.
Connecting to Thrive Hot Folders
Finder on the menu bar click the Go menu then Connect to Server… or use the keyboard shortcut ⌘+K
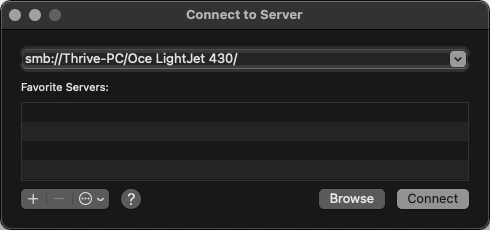
Server Address: smb://Thrive-PC/Oce LightJet 430/
User: thrive
Password: dsi2008
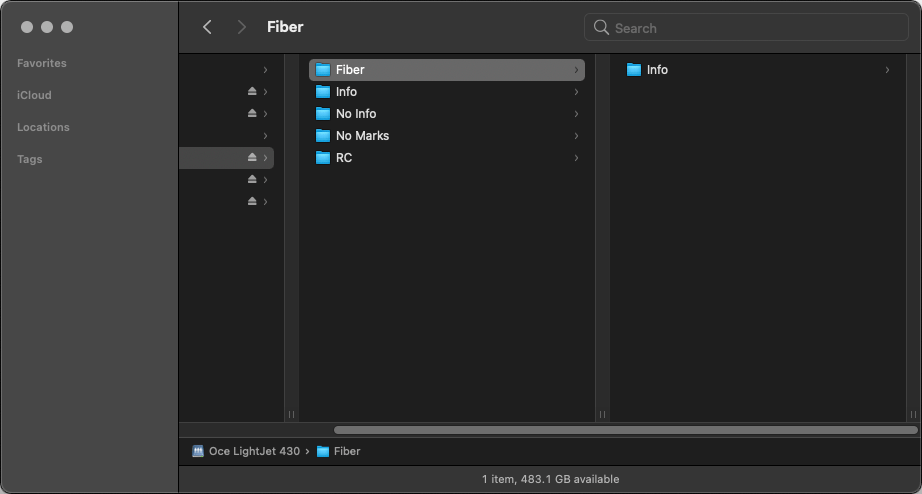
Use the the hot folder that corresponds with the paper you are printing on.
Printing files from Thrive RIP Queue to LightJet Spooler
- Launch both Thrive RIP-Queue and Spooler Controller (FPC)
- Go to RIP-Queue and highlight Océ LightJet 430
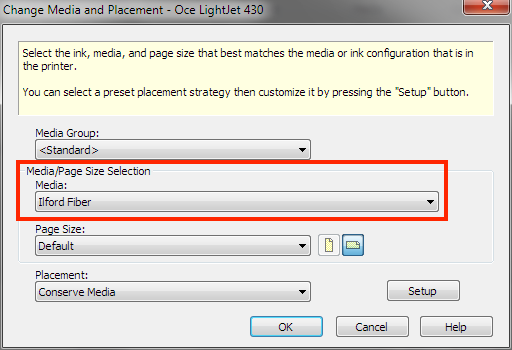
- On the right side click Change… and select the paper type list that is loaded in the LightJet from the Media.
- From your Mac copy prepared files into a hot folder.
- Files dropped into hot folders will show up in RIP-Queue in the Jobs Ready to Print pane
- When you are ready to rip images select the files you want and click the blue pause button. They will start ripping one–by–one
-
Ripped files move down to Buffered Jobs. These can be re-processed without having to copying from your Mac again
-
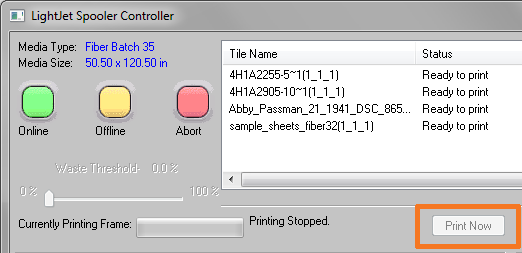
When all images are ripped switch to Spooler Controller
- click the green Online button to put the printer online
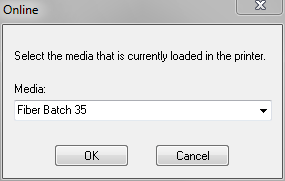
- Select the correct media
- To start exposure click Print Now
Cutting Paper for Processing
- Press Online, Media, Down, Down, Enter
- When the LightJet finished advancing you may cut paper
- You are prompted with two options. Unload Media or Advance for printing again.
- Press Ecape to eject paper
- Press Enter to advance and tape to core
Unloading Paper
- Press Online, Media, Down, Down, Enter
- When the LightJet finished advancing you are prompted with two options; Unload Media or Advance for printing again.
- Press Ecape to eject paper
LightJet Shutdown
- Turn off LightJet using the power switch on back left
- The cooling fan will run for 10 minutes after the LightJet is turned off
- Shut down both workstations
Cleaning LightJet
- Sweeping out drum
- Cleaning output rollers
Pertinent Directories
| Location (LJ-FE) | Description |
|---|---|
C:\LightJetFE\blend\material30 |
Paper targets |
C:\LightJetFE\blend\config14 |
Individual paper batch configs |
D:\ |
Cached printed files |
| Location (Onyx) | Description |
|---|---|
D:\Thrive11\Work\Oce LightJet 430 |
Cached/Buffered Jobs Files |
D:\Thrive11\Input\Oce LightJet 430 |
Quick Set hot folders |