Digitization with DT Atom
Capture One Online User Guides
Transmissive (Film)
Digital Transitions Digitization Workflow Guide: Transmissive
Transmissive Preflight Steps
- Select lens and extension tubes (See Lens/Resolution Chart)
- Set camera position, focus and, level
- Set aperture to ƒ/10
- Set Mode, Profile, and Curve
- Mode: Photography
- ICC Profile: Flat Art Reproduction LED DT Photon
- Curve: Linear Scientific
- Capture LCC raw file
- Generate LCC profile
- Set white balance based on light source
- Set exposure base on light source
- Adjust shutter speed until the brightest luminance value of the LAB Color Readouts is as close to 98, without going over, as possible.
Lens/Resolution Chart
| Film Format | Lens | Extension Tubes | Resolution |
|---|---|---|---|
| 8×10" | 72mm | None | ~1300 ppi |
| 5×7" | 72mm | None | ~2100 ppi |
| 4×5" | 120mm | None | ~2600 ppi |
| 6×7 | 120mm | 40mm | ~4500 ppi |
| 6×6 | 120mm | 40mm | ~4500 ppi |
| 645 | 120mm | 60mm | ~6000 ppi |
| 35mm | 120mm | 120mm | ~9900 ppi |
Reflective (Flat Artwork)
Digital Transitions Digitization Workflow Guide: Reflective
Reflective Preflight Steps
- Select 72mm lens
- Set aperture to ƒ/8
- Set camera position, focus, and level
- Set Mode, Profile, and Curve
- Mode: Photography
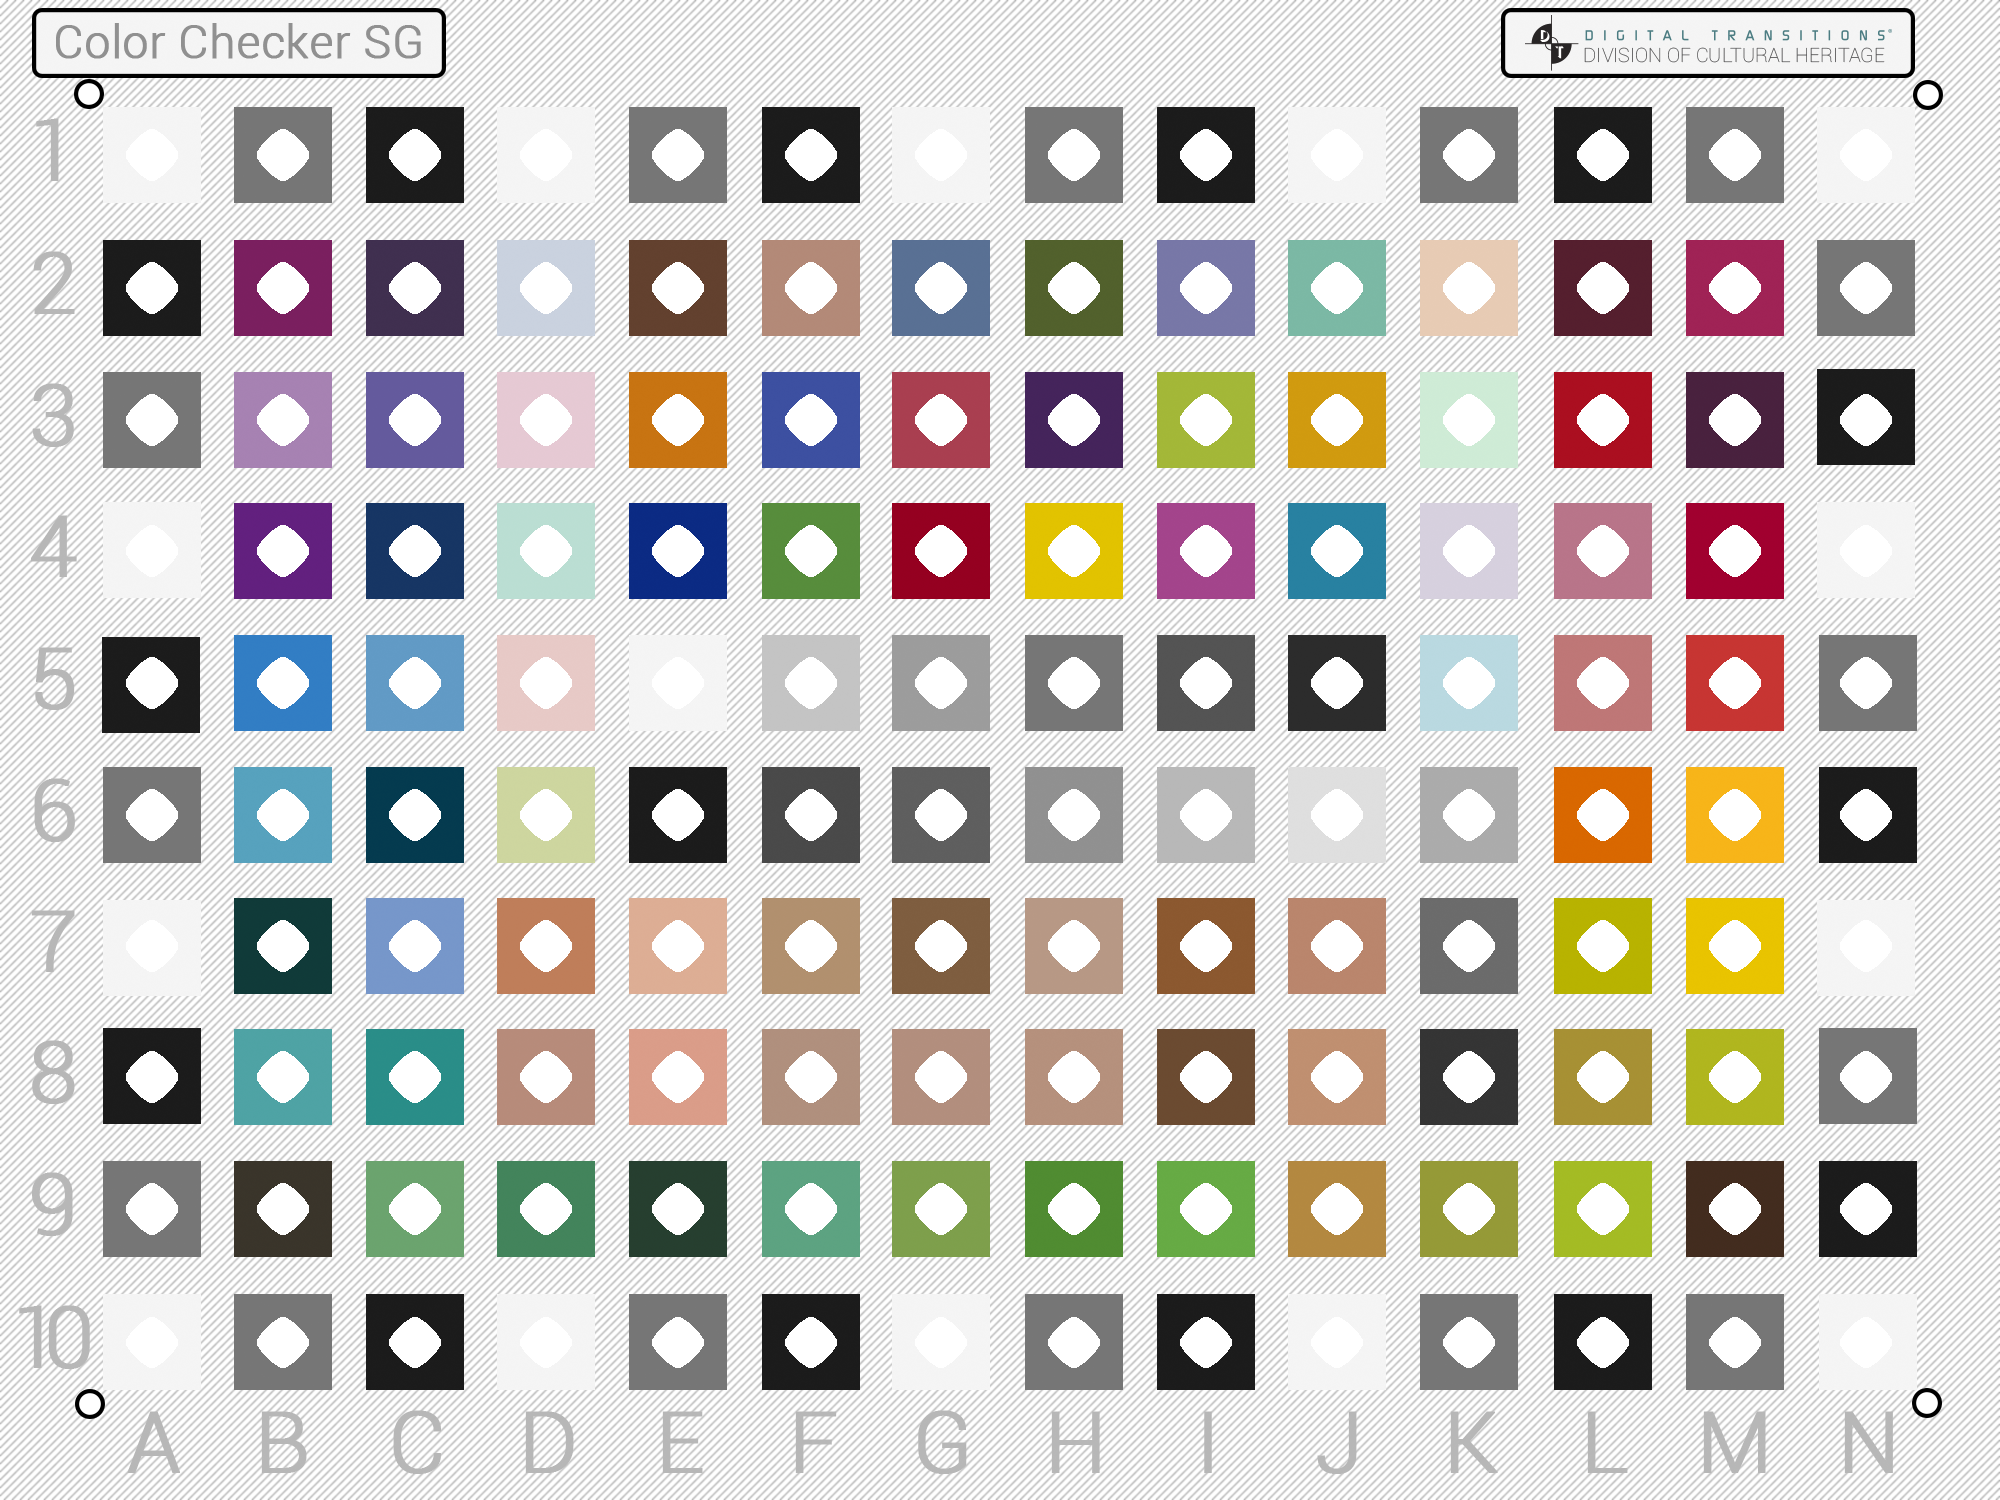
- ICC Profile: ColorChecker SG
- Curve: Linear Scientific
- Capture LCC raw file
- Generate LCC profile
- Set exposure based on patch G5 on ColorChecker SG.
- The ColorChecker SG target patch G5 should have a Luminance value of 65.1 without exceeding it.
- Set white balance based on patch F5 on ColorChecker SG
- After captures are complete use the DT Adobe RGB overlay to fine tune exposure using levels. Apply levels to all captures.
- Use Delt.ae to verify color accuracy.
- Export a full size jpg in Adobe 1998 RGB and upload for validation.